


As we all know WordPress is a popular and most used CMS in internet so its security is big concern for many people as hacker try to hack your WordPress site so security is big deal for all WordPress site owner.As we know that WordPress has a admin login page which will be publicly shown often found at yoursitename.com/wp-admin or yoursitename.com/wp-login.php so it is possible for someone to gain access in your website by guessing your password by repeated trial and error method so it is important to each site owner to protect their WordPress website more harder by enabling two factor authentication for website.
How to Secure WordPress Website with Single Sign On
WordPress single sign on provide more security option once you enabled the single sign on in your WordPress site the login screen of your website will be disabled and you have to login through WordPress.com account in order to access the admin panel of your self hosted WordPress website.
There are some main advantages of using WordPress.com account
- As WordPress.com provide two-factor authentication so the same level of security will be enabled for your WordPress website without need of any plugin.
- If there are some malicious login requests comes on your WordPress site they automatically redirected to WordPress.com in this way it also reduce the load on your server and it website’s database.
- Other main advantage of using WordPress.com is that if you are using multiple WordPress sites then you can login into all of them using single WordPress.com account so there is no need to remember username and password for each website.
How to Set Up Jetpack with WordPress to Enable Single Sign On
As Jetpack is free plugin so we will use this plugin to enable single sign on and two-factor authentication for WordPress site follow below steps
Step 1
Go to this link to create a account on WordPress.com if you already have an account with WordPress.com,you can skip this step.You need to create a dummy blog on WordPress.com site as it is a part of registration.
Step 2
After creating an account with WordPress.com enable two-factor authentication for that click on your profile icon which will be located in top bar of the site and then click on security option  after that click on Two-Step Authentication tab now click on Get Started button
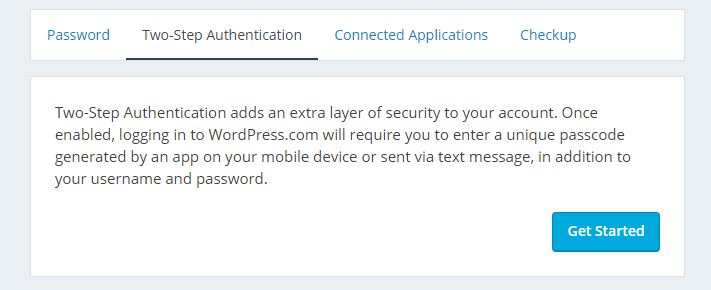 and enter your phone number and country code
 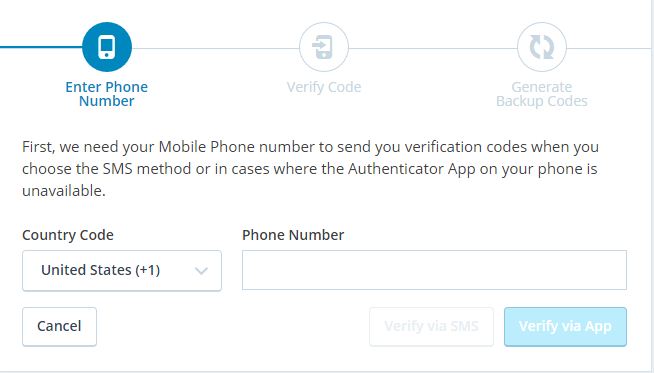 after that WordPress will send you a verification code by SMS or App which option you selected for verification.
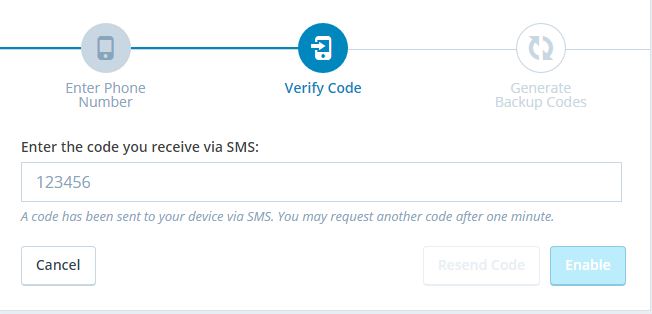
Step 3
Now install Jetpack Plugin into your WordPress website and activate the plugin and then link your website to your WordPress account by click on the green button which says “Connect to WordPress.com”.
Step 4
Once your connection is established then go to your Jetpack settings and activate the “Single Sign On” module.
Step 5
Now go to your WordPress installation folder by FTP or SSH and go to themes functions.php file and copy the following line of code after first line in (wp-content/themes/Your theme-name) functions.php file.
add_filter( ‘jetpack_sso_bypass_login_forward_wpcom’, ‘__return_true’ );
Step 6
Now to link your username that you have used to login into your site to WordPress.com account go to your website’s dashboard and go to Users > Your Profile and look at the bottom of the page that says “Log in with WordPress.com “ and click on that button.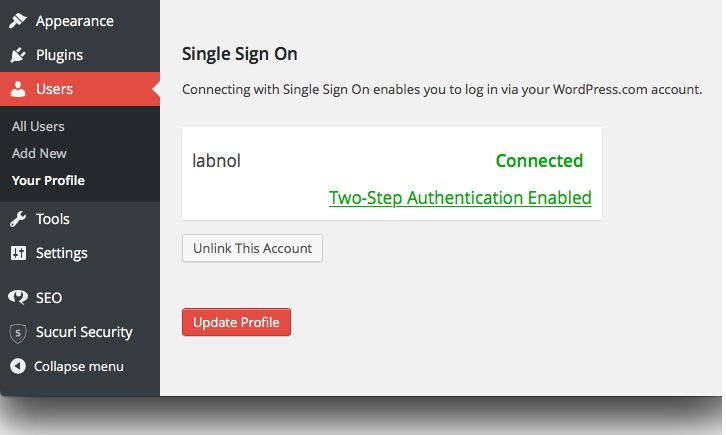
After that you will no longer see login form in your website instead it will forward the users to WordPress.Com site and and once your login through WordPress.com account it will immediately redirect you to the dashboard of your self hosted WordPress Website.
Follow this lesson and try yourself and give your thoughts on it by comment section and also tell about any other better solution if you know regarding two factor authentication and single sign on.
")

